Guida pulizia forno pizza
Descrizione
GUIDA PROFESSIONALE
Pulizia Straordinaria di Scocca e Vetro del Forno Pizza (500 °C)
_________________________________________________________________________________
I forni elettrici semi-professionali per uso casalingo offrono prestazioni straordinarie, ma le temperature fino a 500 °C e i fumi generati dai grassi tendono, dopo molti utilizzi, a far ingiallire il vetro ceramico e a brunire la facciata in acciaio inox.
Quando i normali sgrassatori non sono più sufficienti, è necessario un intervento mirato per rimuovere la patina carbonizzata e far tornare il forno quasi come nuovo. Il segreto risiede nell’azione meccanica controllata di uno strumento semplice ma estremamente efficace: le pagliette in lana d’acciaio finissima già imbevute di detersivo (es. marca Bravo o similari).
🛠️ Strumenti e Materiali Necessari
- Pagliette in lana d’acciaio finissima già imbevute di sapone (es. marca Bravo).
- Panni in microfibra
- Acqua tiepida.
📋 Procedura Passo-Passo con Foto
| Fase 1: Valutazione dello stato iniziale e smontaggio
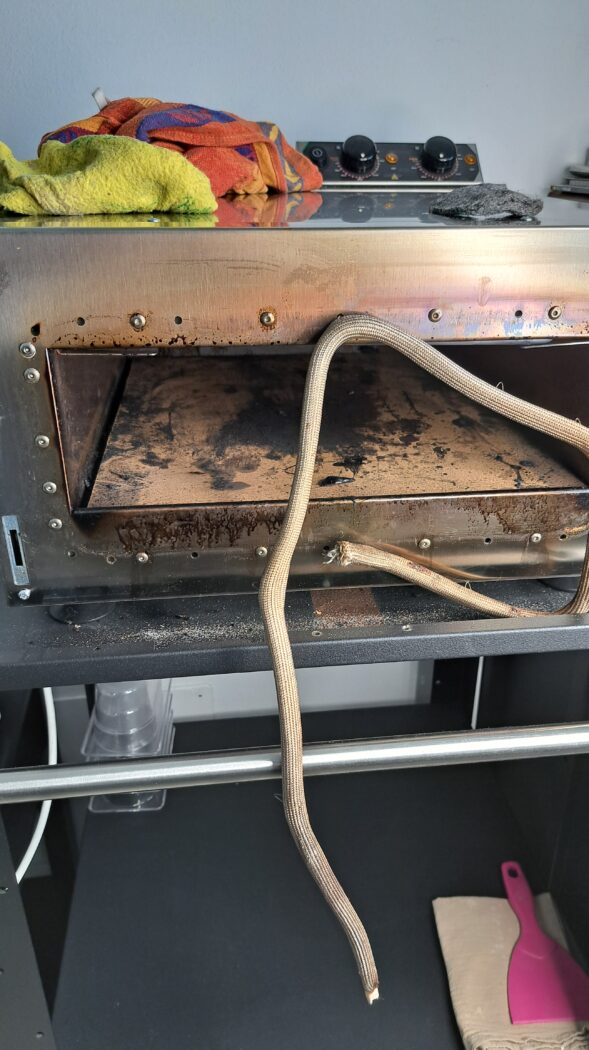
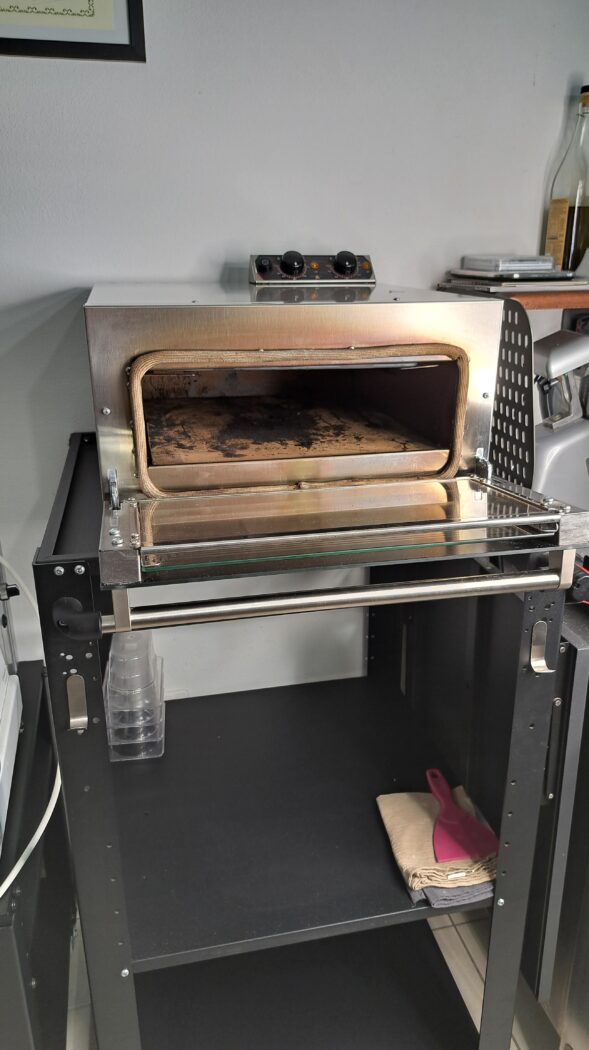
Prima di iniziare, assicurati che il forno sia completamente freddo e scollegato dalla rete elettrica. Come si nota nello stato iniziale, l’utilizzo prolungato crea una spessa barriera brunastra che opacizza il vetro e scurisce l’acciaio intorno alla bocca del forno. Per lavorare comodamente e raggiungere ogni angolo, rimuovi delicatamente la guarnizione della porta dal suo alloggio. |
| Fase 2: Azione meccanica con paglietta saponata
Prendi la paglietta imbevuta di detersivo e inumidiscila leggermente con acqua tiepida per attivare il sapone integrato. Evita di bagnarla troppo per non disperdere il detergente concentrato.
|
| Fase 3: Applicazione e tempo di posa sulla facciata
Insisti particolarmente sulla facciata in acciaio, specialmente intorno ai rivetti della bocca del forno dove il fumo tende a stratificarsi. Strofinando, si genererà una schiuma bianca densa. Lasciala agire per 1 o 2 minuti sulle zone più critiche in modo che il detersivo sciolga chimicamente i legami del grasso.
|
| Fase 4: Risciacquo, asciugatura e risultato finale
Rimuovi la schiuma e lo sporco disciolto utilizzando un panno in microfibra ben inumidito con acqua pulita, risciacquandolo spesso. Infine, passa un secondo panno in microfibra completamente asciutto (o della carta assorbente) per lucidare la superficie. [ |
| 💡 Consiglio del Professionista
Esegui questa pulizia straordinaria non appena noti i primi accenni di ingiallimento permanente. Rimuovere i residui quando sono ancora superficiali richiede meno sforzo e protegge l’acciaio inox della facciata dalle alterazioni cromatiche a lungo termine causate dal calore. |
PROFESSIONAL GUIDE
Deep Cleaning Guide for Pizza Oven Casing and Ceramic Glass (500 °C / 932 °F)
_________________________________________________________________________________
Semi-professional electric pizza ovens designed for home use deliver outstanding performance. However, due to extreme cooking temperatures up to 500 °C (932 °F) and persistent grease vapors, the ceramic glass window and the stainless-steel front casing inevitably develop yellowish stains and dark carbonized tarnish over time.
When standard degreasers no longer suffice, a heavy-duty maintenance routine is required to lift the baked-on soot and restore your oven’s original look. The secret lies in the controlled abrasive action of a simple yet highly effective solution: pre-soaped extra-fine steel wool pads (such as Bravo brand or similar alternatives).
🛠️ Required Tools and Materials
- Pre-soaped extra-fine steel wool soap pads (e.g., Bravo or equivalent).
- Clean microfiber cloths (at least two).
- Lukewarm water.
📋 Step-by-Step Procedure with Photo References
| Step 1: Initial Assessment and Disassembly
Before beginning, make absolutely sure that the oven is completely cold and disconnected from the power outlet. As observed in the initial assessment, frequent use leaves a heavy, brownish glaze that clouds the glass window and tarnishes the steel around the chamber mouth. For comfortable handling and deep coverage, gently peel the door’s rubber gasket out of its slot.
|
| Step 2: Scrubbing with Pre-Soaped Steel Wool
Take the pre-soaped steel wool pad and moisten it slightly with lukewarm water to activate its built-in detergent. Do not soak it excessively to prevent flushing away the concentrated cleaning agent.
|
| Step 3: Foam Application and Dwell Time
Focus heavily on the steel faceplate, particularly around the rivets near the oven opening where exhaust grease concentrates. As you rub, a dense white lather will build up. Allow this soap foam to sit for 1 to 2 minutes on critical spots so the chemical agents can penetrate and break down the baked-on grease layers.
|
| Step 4: Rinsing, Drying, and Final Results
Wipe away the dirty lather and dissolved residue using a microfiber cloth thoroughly dampened with clean water, rinsing the cloth frequently to avoid smearing. Finally, polish everything down with a second dry microfiber cloth or heavy-duty paper towels.
|
| 💡 Pro Tip from the Kitchen
Perform this deep cleaning as soon as you notice the first signs of permanent amber discoloration. Removing the film while it is still thin requires far less effort and completely shields the high-grade stainless steel front of your oven from long-term, heat-induced color alterations. |